Table of Contents
Ooznest Workbee
Overview
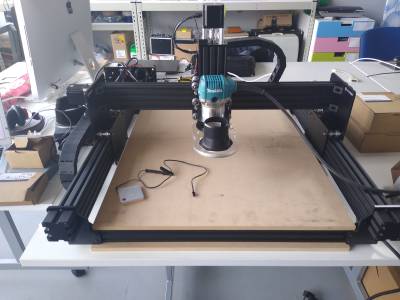
The Ooznest Workbee is a CNC machine that came as a flatpack build - A number of members have contributed to building this machine and it was put together over many hours!
A CNC milling machine is like the reverse of a 3D printer. Where a 3D printer starts with nothing and builds up a 3D model layer by layer, a CNC miller starts with a lump of material and cuts away at it layer by layer to get a 3D model.
Ooznest claim that this machine can mill aluminium, but there is some evidence against this - we recommend sticking to woods and machinable plastics with this machine to avoid disappointment!

- be able to create a 3D CAD model that is millable, and know how to create 'toolpaths'.
- have a basic understanding of CNC milling principles, including which milling bits and speed settings are appropriate for different jobs and materials.
- understand the specific way to get jobs running using the Ooznest Workbee hardware and interface.
Useful Information
The Workbee has a Duet wifi interface which allows the control interface to be accessed by any computer on the network using a web browser. You must be on the Wastesavers Wifi network to do this and Ooznest only support the Chrome browser. To access the machine interface, the Workbee must first be powered on. It can then be accessed by navigating to http://workbee.local/
The router is a Makita RT0700CX4. See the tables below for indicative speed settings (based on router bits under 1“ diameter, larger bit = slower RPM):
| Setting | RPM | Material |
|---|---|---|
| 1 | 10,000 | |
| 2 | 12,000 | Ply |
| 3 | 17,000 | Beech |
| 4 | 22,000 | Walnut |
| 5 | 27,000 | |
| 6 | 30,000 |
CAM Settings (indicative!)
| Material | Feedrate | DOC |
|---|---|---|
| Ply | 1200-2400mm/min | 1-3mm |
| Beech | 900mm/min | 2mm |
| Walnut | 800mm/min | 1-2mm |
Check list for running a CNC job:
- Securely fix the spoiler board to the frame of the machine using G-clamps
- Securely fix your stock material to the spoiler board (I normally use Mammoth Tape)
- Load an appropriate bit for your job into the router, note that the chuck adaptor tends to get stuck in the router!
- Connect the XYZ Touch Probe to the port located on the Z-axis assembly of the Workbee, and connect the crocodile clip to the spindle bit. Use the web interface to automatically 'zero' the spindle position to a corner of your project material. A guide for this operation can be found here.
Always test the probe is operational before you start as the machine will not stop if it does not detect the probe!. Using the automated Touch Probe Cornering will set the work zero coordinates in the software
- Upload your CAM file to the machine using the web interface
- Set the router speed using the table above for reference, power on the router
- Start your CNC job from the web interface. You may want to lower the feedrate using the web interface for the first plunge, as this is the most aggressive cut.
We have successfully tested the Workbee using a model generated in Fusion360 using the built in manufacturing module, this is available for free in the hobbyist version of Fusion360 with some features restricted. We strongly recommend that you read the docs and watch the Youtube demo below, and also spend some time to research milling bits and settings for your stock material.

Safety & Induction

- The Workbee should always be operated inside the protective enclosure. The enclosure reduces the noise produced by the machine and reduces the risk of chips flying away during operation.
- CNC jobs tend to last for a long time, you do not need to watch the machine constantly but you must be present in the makerspace when your job is active on the machine. Consider if you have enough time to complete your project!
- On a similar note - milling can be loud and annoying. This loud and annoying sound can be constant over a long period of time. Consider if it is an appropriate day to run your job and how it might impact other users in the space.
Maintenance History
Date next maintenance is due/recommended: 01/08/22
| Date | Member ID | Notes |
|---|---|---|
| 26/05/22 | Aidan | Z-axis bearings were not sufficiently tight, plus router mount was loose. This was causing problems as the router would wobble and the rigidity was significantly reduced - fixed |
| 24/05/22 | Aidan & Tim | Z-axis limit switch repaired, machine now functional - n.b. we are concerned about the Z-axis limit switch cable assembly snagging against the cable guard during x-axis movement - this should ideally be addressed |
| 21/05/22 | Aidan | Z-axis limit switch is broken - new switch ordered |
| 13/10/21 | Aidan | Updated firmware to v3.3, this got XYZ probe working correctly. Successfully completed a test cut |
| 04/10/21 | Aidan | We set the leadscrew tension and successfully tested a G-code file |

